Classic Wow - Never Lose Threat on Onyxia Ever Again
| | The subject field of this article was removed in patch 3.two.2 simply remains in World of Warcraft: Classic.
|
- This commodity is about the in-game dominate. For character biography, see Onyxia. For the 10 and 25-human versions introduced in Wrath of the Lich King, see Onyxia (tactics).
| | |
|---|---|
 | |
| Gender | Female |
| Race | Blackness wyrm (Dragonkin) |
| Level | ?? Dominate |
| Reaction | Alliance Horde |
| Location | Onyxia's Lair, Dustwallow Marsh |
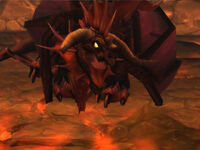
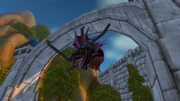
Onyxia is a level ?? boss black dragon in Onyxia'south Lair.
Contents
- 1 Onyxia's abilities
- 1.1 Overall abilities
- 1.2 Phase One abilities
- one.3 Phase Two abilities
- one.iv Phase Three abilities
- 1.v Seasons of Mastery
- ii Combat strategy
- 2.1 Preparation
- 2.2 Phase One strategies
- 2.two.1 Entering and positioning
- 2.two.2 Plant Main Tank threat and initiate slow damage
- 2.3 Phase 2 strategies
- 2.3.1 Positioning
- two.three.2 Whelps
- ii.3.3 Dodge deep breath attacks
- two.3.4 Max out damage
- ii.3.5 Ready for Stage 3
- 2.iv Stage Iii strategies
- two.4.i Positioning
- ii.4.2 Aggro command
- 2.four.three Dealing with fearfulness
- two.iv.4 Perform tiresome DPS
- 2.v Hints
- 3 Loot
- iv Quests
- 5 Bugs
- 5.i Bugged heal
- v.two Melee in phase 2
- 5.3 Wander off
- six In Wrath of the Lich Rex
- 7 Patch changes
- viii See likewise
- nine References
- x External links
Onyxia's abilities
Onyxia has many abilities that she uses throughout any fight with her. They vary depending on the stage of the fight that y'all are in. The abilities are as follows:
Overall abilities
- Taunt Amnesty
- Onyxia is allowed to all abilities which cause a monster to instantly target the pulley. So, abilities such as
 [Taunt] ,
  [Challenging Shout] , and
  [Mocking Blow] don't work equally usual on her. Other threat-generating abilities such as
  [Sunder Armor] do work as usual.
- Fire Immunity
- Onyxia is immune to all burn down spells and effects.
- Whelp Eggs
- At the East and West sides of Onyxia's Lair are the two entrances to a tunnel full of eggs. When a character gets as well close to the eggs, many whelps will hatch and attack.
- Warder Respawn
- As soon as Onyxia is engaged, her Onyxian Warders respawn in the tunnel. They despawn as soon every bit she is defeated. These Warders discourage players from hiding from her in the tunnel.
- Teleport
- Equally with many other raid bosses, Onyxia will teleport characters to herself if they are far away or unreachable when she is in gainsay. This usually happens to characters in the entrance tunnel, merely tin randomly happen to characters at any position in her lair.
Phase One abilities
- Flame Breath
- This is a blast of fire that hits everyone in forepart of Onyxia, including to a considerable distance to the sides. This damage is burn based and hits for upwards of 4000 harm. At level seventy information technology is very easy to survive a Flame Breath.
- Knock Away
- Amercement her main target, knocking it dorsum a distance, and reducing the threat of the target by one quarter (25%).
- Wing Buffet
- Damages and knocks back multiple targets in a cone in front of Onyxia. Unlike the Drakes in Blackwing Lair, Onyxia does non reduce her threat of targets she hits with this attack.
- Cleave
- Nasty physical damage to multiple targets immediately in front of Onyxia.
- Tail Sweep
- Onyxia can attack everyone backside her with her mighty tail. This hits for very niggling impairment (about 300) but sends the target flying sideways. This attack can cause a wipe if the victim gets knocked into a whelp cavern.
Phase Ii abilities
- Flight
- In the 2nd stage of the Onyxia fight, she takes flight. Normal melee auto-attacks cannot reach her. Special melee attacks (rogues deadfall, sinister strike, eviscerate...) tin reach her.
- Equally of 21/02/2009 Patch 3.0.9 Auto Attacks could achieve her, tested during a solo attempt.
- Engulfing Flames (Fireball)
- While in flight Onyxia will exhale fireballs down on random players. This hits as a main hit and a splash damage hit. It does upwards to 3000 harm to the player it hits and can practise up to 1500 to anyone nearby. Annotation: Research in November 2006 strongly indicates that these fireballs target whoever is highest on Onyxia'south threat list, and impose a large (probably complete) threat wipe for the characters targeted.
- Whelp Spawns
- Groups of whelps periodically hatch from the eggs and attack, regardless of whether whatever characters are most them. This includes a large spawn at the kickoff of the phase, and pocket-size spawns periodically during the phase.
- Onyxia'south Breath (Deep Breath)
- Onyxia emotes "Onyxia takes in a deep jiff..." and a few seconds later, she flies across her sleeping accommodation as she breathes a huge gout of fire that rolls straight across the room from her initial position to the contrary wall. Characters in the centre of this set on get hit v or six times and are likely to dice. Characters on the sides of the assault become missed entirely or go hit but in one case.
- Despite being "breaths" they don't actually originate from the front of her — they really originate from the floor straight below her and travel direct to the contrary corner or side of her lair. Melee who attempt to stand under her to DPS should keep this in heed and be prepared to immediately run to a condom spot if a deep breath occurs.
- In that location were many theories almost deep breaths being caused by clumping, not enough DPS, or the number of debuffs on her, withal Jeff Kaplan stated in a video interview with the developers in June of 2007 that the trigger for the Deep Breath is "totally random" [ane].
- It is homo nature to detect patterns in randomness, so many players insist that they know exactly what causes the deep breath attack. However, each of these theories has been tested and found to be faux. In that location are simply two techniques that have been proven to piece of work confronting Deep Breath attacks: Damage her more than apace so that she has fewer opportunities to perform the assail, and motility out of the way when she does perform it. See below to see how to contrivance this attack.
- Notation that well-geared guilds can bring her through Phase Two so quickly that she merely moves a couple times, and thus has a good hazard of not performing the set on at all. The members of these guilds report that their techniques work considering Onyxia inappreciably ever uses her Deep Breath attacks any more. In fact, the time spent perfecting their techniques was too fourth dimension spent gathering powerful gear, then Onyxia is merely not in the air long enough to perform the attack. Anyone wishing to promote a theory about what causes the attack should test it by leaving Onyxia up in the air for at least 15 minutes, which will be long plenty to collect useful information.
Phase Three abilities
- Stage 1 Abilities
- During Phase Three, Onyxia uses all of her Phase One abilities again.
- AOE Fear (Bellowing Roar) / Lava Crack Eruptions
- Onyxia does an AoE fearfulness at random intervals, causing anybody to run around randomly for a few seconds. Sometimes in that location are 30 seconds between fears and sometimes equally little as 10 seconds. Just before she casts the fearfulness, the screen shakes. After the fear is over, the lava cracks spew forth lava for a few seconds. Characters striking with the lava have nigh 1,500 points of fire damage (unresisted).
- Whelp Spawns
- Small groups of whelps occasionally spawn from the eggs and attack, regardless of whether any characters are near them. These spawns are rare, different the common spawns in Phase Two. These spawns are comprised of five or so whelps, different the huge spawns of 20+ whelps that result when characters are feared or knocked into the eggs. These spawns usually appear early in Phase Three, and may exist delayed furnishings of the normal whelp generation in Phase Two.
Seasons of Mastery
During the Season of Mastery, two drakes will spawn when Onyxia is pulled. In addition, an Onyxian Warder will enter the room at the first of phase 2.
Combat strategy
The Onyxia fight is made up of three separate phases. Phase One starts when any graphic symbol enters her chamber. Phase Two starts when she is brought downwardly to 65% wellness. At this point she walks to the south end of the room and take flight. Stage Three starts when she is brought downwardly to 40% wellness. She lands and continues the fight from the ground.
Preparation
Upon entering Onyxia's Lair, you will fight through a tunnel containing four Onyxian Warders. These are piece of cake raid monsters. The keys to defeating them are to make sure that simply the main tank is close enough to them to become hit by their Burn down Nova attack, and to pull them carefully, so that you face up only i at a time.
When yous reach the main chamber at the end of the tunnel, you will run across Onyxia resting on the ground. Have this time to buff everyone and ensure that everyone has full health and mana. If yous are using Greater Fire Protection Potions, take them at present to commencement the potion cooldown. Select and put on your equipment for an appropriate mix of burn resistance, armor, healing, mana regeneration, and damage output.
Prepare up a healing rotation on the main tank to ensure he stays at full health, and that healers can regenerate mana between rotations.
Constitute ii groups (typically group seven and grouping 8) as whelp groups. They volition kill whelps during phase two. These groups must have at to the lowest degree 1 mage for AoE and is best to accept another form of AoE equally well (either a second mage or a warlock). They also crave healers and warriors. In that location should exist no whelps in phase 1 or phase three, merely they sometimes happen anyway. These groups should continue an eye out for whelps in those phases merely tin can focus mainly on Onyxia with the remainder of the raid.
Constitute which groups go where for phase one and phase three. Typically, groups 1, iii, five, and 7 go left (west), and groups 2, 4, 6, and 8 get right (east).
Phase One strategies
Phase One starts equally soon every bit anyone enters Onyxia's main chamber. There are three main goals for Phase One:
- Establish positions.
- Establish and maintain aggro on the chief tank.
- Slow (auto-attack and non-mana) harm until Onyxia enters Stage Two.
Inbound and positioning
When everyone is fix, the Chief Tank charges in with everyone else following about two or 3 seconds behind. The main tank runs straight past Onyxia, pulling her to the far n side of the room so that she faces the wall. The best positioning takes a little practice and is a few steps in front end of the wall. This is so that the chief tank's back is to the wall to limit the effectiveness of her Knock Away ability and so that the main tank is the only one in front of her when she breathes fire.
Anybody else must charge in two or 3 seconds after the main tank. If they look longer, there is a danger of attracting attending from a freshly-spawned Onyxian Warder. If they go sooner, they run the risk of getting hitting by Onyxia's Flame Breath attack. Don't get alee of her!
Anybody but the primary tank splits to the sides to the northeast and northwest "corners" of Onyxia's chamber. Each side forms three main groups. Closest to Onyxia is the melee group, roughly at her shoulders. Adjacent is the ranged and healing group, which should be right forth the wall. Last, and farthest south, is the whelp grouping.
Plant Primary Tank threat and initiate slow damage
Initially, nobody attacks Onyxia except the main tank. The main tank is the only one to be fighting Onyxia for at to the lowest degree a minute, or until she drops to 99% health (whichever comes starting time).
At this point, the DPS characters start doing harm while being careful to avoid drawing aggro away from the master tank. This is not a race. Phase I is a slow, steady fight. Do not try to rush. All DPS characters try for about 50-75% of their max DPS output. Anyone with a way to dump aggro does so (e.g. Hunters can ![]() [Feign Death] , Rogues can
[Feign Death] , Rogues can ![]() [Feint] ) as often as they tin can. Mages and warlocks apply wands to save mana and generate minimal threat (having over 90% mana going into Stage Two is helpful).
[Feint] ) as often as they tin can. Mages and warlocks apply wands to save mana and generate minimal threat (having over 90% mana going into Stage Two is helpful).
Think that Onyxia'due south Flame Breath can do upwardly to 4000 impairment. Remember this, because if anyone draws aggro abroad from the main tank, she turns sideways and may breathe. If she does, she can kill all cloth wearers (casters and healers) on that side, very likely causing a wipe. Therefore it is very important to non overdo the damage.
Also remember that Onyxia'due south Knock Away ability reduces her threat on the main tank. The chief tank is unable to hold aggro besides as usual, so the DPS classes must concur dorsum on their damage output.
If, despite this warning, y'all pull aggro off of the chief tank and Onyxia attacks you, attempt to shake her off of you lot with ![]() [Feign Death] ,
[Feign Death] , ![]() [Vanish] ,
[Vanish] , ![]() [Ice Cake] ,
[Ice Cake] , ![]() [Divine Shield] ,
[Divine Shield] , ![]() [Divine Protection] , or
[Divine Protection] , or ![]() [Fade] . If that doesn't work, run to the tanking spot at the northern end of the sleeping room and fight her at that place. You are going to dice anyway, and this volition go along Onyxia from breathing flame on other characters as she kills you.
[Fade] . If that doesn't work, run to the tanking spot at the northern end of the sleeping room and fight her at that place. You are going to dice anyway, and this volition go along Onyxia from breathing flame on other characters as she kills you.
Phase Two strategies
Phase Two starts when Onyxia reaches 65% health. She walks towards the south cease of her lair and takes flight.
At that place are iv bones goals for Phase Two:
- Reduce damage from Deep Breath and fireball attacks.
- Go on whelps under control.
- Impairment Onyxia as quickly every bit possible.
- Prepare for Phase Iii.
Positioning
In this phase you lot must ensure that everyone maintains spacing from each other to reduce boom harm from fireballs. Players need to motility around to ensure they have range to Onyxia while she is flying. Ideally you desire to be to on either side of the line created by her head-tail centrality as her breath always flows through information technology. This will minimize the distance yous need to run to avoid a deep breath should it occur. It's also wise to turn on an aggro alarm modern to warn you when you're about to exist fireballed. There is always a 2–5 second delay between her targeting someone and actually shooting the fireball. Once targeted, skilled players can distance themselves from teammates to aid avoid collateral harm.
Whelps
When Onyxia takes off, each whelp pit volition spawn a large group of whelps that need to be dealt with quickly. The raid should help the whelp groups clear this initial spawning as fast equally possible before moving on to aid with Onyxia. Since the first spawn is quite big and tin can kill clothies quite easly, it is advised to put a tank correct at the entrance to the whelps pit, who will cast ![]() [Challenging Shout] to aggro the whelps to him. Then the mages tin can kill those hands. Later the initial grouping is expressionless the whelps spawn in regular intervals in smaller numbers that tin be dealt with fairly hands in one case you are used to them.
[Challenging Shout] to aggro the whelps to him. Then the mages tin can kill those hands. Later the initial grouping is expressionless the whelps spawn in regular intervals in smaller numbers that tin be dealt with fairly hands in one case you are used to them.
Dodge deep breath attacks

The path of Onyxia'due south Deep Breath power is dependent on her position.
During Stage Ii, Onyxia has half dozen possible positions in her cavern and stays in each position long enough to fire 5 fireballs. After that, she randomly moves clockwise, counterclockwise or across her chamber. If she chooses to motility across her bedchamber, she will perform a Deep Breath attack on the way. She will emote, "Onyxia takes in a deep breath..." At that place are a slew of AddOns which announce this across a player's screen.
Upon this announcement, everyone must immediately run to a safe position.
For each of the half dozen possible positions she moves to at that place are ever 2 positions in which the raid tin stand and exist safe from the deep breaths. If she's in a corner position, and so the two rubber positions are the adjacent corners and if she's in a side position then the two safe positions are the adjacent sides. For example if she's in the top-left corner then the superlative-right and lesser-left corners are both safe and if she's at the peak-center and so the two rubber positions are the left-center and right-center. Anyone not in a safe position unremarkably dies during a deep breath unless they get lucky with resisting the burn down damage.
Information technology is useful to have hunters utilise Track Dragonkin, ping her position on the mini-map, and announce each time she changes position then that everyone can then adjust their position. Ideally, anybody remains fairly close to a safe position at all times during Stage 2.
Max out damage
Become Onyxia down to virtually twoscore% wellness equally fast as yous can. Ranged damage is the chief affair that can hit her while in flying, so information technology is important to have everyone doing every bit much ranged DPS as possible. Rogues and other melee can hit her by using special attacks. Track all debuffs and DoTs on her and ensure they are kept up to motion through this stage as quickly as possible. Onyxia'southward targeting does not follow the usual rules during Phase Ii, so there is no reason to agree back on harm. The more quickly Phase Two ends the fewer opportunities Onyxia volition have to practice a Deep Jiff.
Prepare for Phase Three
Phase Two ends equally Onyxia is brought to forty% health. At the beginning of Phase Three, she lands at a random signal in her chamber and starts her ground attack. She casts a fright spell within seconds of landing, so all players must position themselves away from the whelp caves before she does so. If non, the fear effect may crusade some to run into the whelp eggs, spawning a lot of whelps.
Due to Onyxia's in-flight threat wiping, the main tank will take very little threat equally she lands. He must build rage on whelps, then use ![]() [Sunder Armor] and other threat-generating attacks on Onyxia shortly earlier she lands. Another technique is for the principal tank to bandage himself equally she is landing due to the large corporeality of aggro created by the self-healing. Casters stop attacking somewhere betwixt 41% and 44%. Hunters and rogues keep attacking until she starts to land, at which betoken they Feign Decease or Vanish.
[Sunder Armor] and other threat-generating attacks on Onyxia shortly earlier she lands. Another technique is for the principal tank to bandage himself equally she is landing due to the large corporeality of aggro created by the self-healing. Casters stop attacking somewhere betwixt 41% and 44%. Hunters and rogues keep attacking until she starts to land, at which betoken they Feign Decease or Vanish.
Stage Three strategies
Phase 3 starts every bit Onyxia is brought to forty% health. She lands and resumes her attack from the basis. The stage ends when she dies.
Phase Three tactics are very similar to Phase One, except that fear requires special treatment and the raid volition take impairment from lava spurts. The main goals are as follows:
- Position to reduce trouble from fearfulness.
- Establish and control chief tank aggro.
- Deal with fear.
- Perform slow DPS.
Positioning
In Stage Three anybody should motility back to their Stage One positioning with some small-scale changes. Stand in a spot well abroad from the cracks that erupt lava. While this will not foreclose taking harm, it will limit it somewhat. Make certain everyone is spread out and that the chief tank is back to the north finish of the room.
In that location is a considerably amend spot for ranged DPS characters. At the verbal eye of the room is a medium-sized area with fewer lava cracks (prior to Patch 1.11, these did not spew lava at all). Ranged impairment-dealers standing here can avert all damage from Onyxia and the lava, although they may be attacked by whelps. They must stand back far enough to avoid Onyxia's tail. In that location are two pocket-sized spikes of rock that make excellent places to stand.
Healers who are healing the chief tank should stand against the wall in their corners, as far back every bit possible. This gives them the best chance to avoid both Onyxia'south Burn Breath and Tail Swipe attacks when feared.
Melee must stay well forward of her tail! If you lot are also far back, she may fright you into her tail, which volition toss you lot into a whelp pit, which will spawn 20 whelps, which will wipe the raid. Too, everyone must stay away from the whelp pits to avoid being feared directly into them. If you do end up spawning a agglomeration of whelps, call it out so that the whelp groups can kill them quickly. AoE damage is required to accept whatsoever chance of success.
Aggro control
At offset of Phase Three, the main tank may have a difficult time re-establishing aggro. Onyxia may assail and kill a half-dozen members of the raid before the main tank finally gets her attending. Getting her attending is a lot faster if, almost the end of Phase Two, the main tank applies Sunder Armor and the casters terminate attacking. Usually a full 1% health drop (as in Phase 1) volition ensure complete aggro control for the rest of the fight if people are careful with their DPS.
As in Phase One, if you depict aggro from the main tank, either shake information technology or run to the tanking spot to die. This is very likely to happen at the kickoff of Phase Iii to all cloth classes, and so be ready for information technology.
Onyxia'south threat at the start of Phase Three is a hot topic of debate. Research in Nov 2006 strongly indicates that her Phase Two fireball assail, when it scores a targeted (non AoE) hit, is a consummate threat wipe. This would go a long way toward explaining the foreign beliefs at the beginning of Stage Three.
Dealing with fright
Onyxia's fear spell causes a considerable amount of chaos. Aside from disrupting healing and damage-dealing, information technology causes all characters to lose their positions and to take damage from running through lava spurts. It sometimes causes the main tank to run sideways. When this happens, Onyxia turns to follow him, and may then breathe flame on members of the raid on that side.
The cracks spew lava immediately after the fear effect ends. If your grapheme is standing on a crack when the fear effect ends, motion him to a safe spot quickly.
The fearfulness interrupts long-cast spells, and wastes much of the duration of brusque-term buffs (such equally from trinkets). Apply these immediately subsequently a fearfulness outcome ends, in order to reduce the chance of disruption from the next fear.
It helps to take a Priest be the main healer on the MT during Phase 3. The Priest ability ![]() [Fearfulness Ward] , when bandage on the MT during Stage Three, can forestall the main tank from being feared.
[Fearfulness Ward] , when bandage on the MT during Stage Three, can forestall the main tank from being feared.
Shamans can institute two Tremor Totems next to the tank, 3 seconds apart. These will ordinarily cause the tank to come out of fear chop-chop. They need to be renewed during the fight.
Both Alliance and Horde tanks can avoid the fear somewhat via the Stance Dance, as with Magmadar. The shaking screen gives but enough warning to use ![]() [Berserker Rage] . All the same, the reduced threat generation and extra damage taken from
[Berserker Rage] . All the same, the reduced threat generation and extra damage taken from ![]() [Berserker Stance] while the healers are feared can be problematic.
[Berserker Stance] while the healers are feared can be problematic.
An avant-garde tactic is to take two tanks, who must both build threat. The Off-Tank hits Berserker Rage to avert the fearfulness, and becomes the primary tank until the fear is over. This requires more skill by the healers and tanks, and more burn resistance gear. However, if washed properly, it ensures that Onyxia volition never turn due to fright effects. The off-tank may be positioned with the primary tank, to avoid repositioning, or at her shoulder, to avoid harm.
If you lot are not the tank, you must not avoid or break the fearfulness effect. Onyxia volition always attack un-feared targets before targets that do have the fear issue. What this ways is that if you aren't feared, Onyxia may turn, breathe flame on you and many other players, and wipe the raid. Stay away from tremor totems. Don't apply Volition of the Forsaken or your PvP trinkets to break fear.
In that location is a small gamble of resisting the fear. If you resist it, Onyxia will attack you. Run to the tanking spot until the main tank recovers from fear and regains aggro.
Perform slow DPS
This office of the fight is similar to Stage One. Keep your DPS under control doing about 50-75% of your max and clearing aggro as often as you tin.
Damage-dealing classes tin gradually ramp up their damage output equally Stage Iii progresses and the master tank builds more threat. Hunters can exercise this more than quickly by using Feign Death and Rogues can do so with Vanish. At 10% health, information technology is usually possible to use maximum impairment. This is a balancing act, every bit Onyxia must be brought down earlier compunction from the lava spurts causes the loss of also many players, yet the damage-dealers must not pull aggro from the chief tank.
Hints
Onyxia is more about long-term patience than all-out DPS and speed. If yous follow the strategies laid out here, have patience and practice a piffling, y'all should accept an piece of cake time beating her. Phase Ane is very easy if no 1 pulls aggro off the main tank. Phase Two becomes easy once you lot figure out how to deal with the whelps, dodge Deep Breath attacks, and keep up ranged DPS and DoTs. Phase Three requires some luck the first several times you do it and a ton of skill on the primary tank'south part to keep control while existence feared and knocked back.
The hardest part of the whole fight is the primary tank regaining aggro at the finish of Phase Ii / start of Stage Three. Once that function is mastered, the fight goes a lot more smoothly. Once once more, the central is for the main tank to utilise Sunder Armor to Onyxia while she is withal in the air.
The next-hardest part of the fight is learning to avoid Deep Breath attacks. In one case again, the keys here are to keep your character positioned in or well-nigh a safe spot at all times during Phase Two and to impairment Onyxia and so speedily that she has few chances to perform the attack.
Keep your tanks alive at all costs. Since Onyxia is immune to taunt, your main tank cannot regain aggro if he dies and is resurrected. If your main tank does die, your raid's simply hope is to have some other tank take over.
This is a scripted fight that takes some practice. No matter how accurate any strategy guide is, naught can ready you more than experience. Expect a few wipes and plan for it. Some guilds take 20–thirty wipes earlier downing her for the first time, and so continue to have occasional wipes.
Greater Fire Protection Potions are useful during this fight, especially while learning it. They are meliorate than healing potions in dealing with fire damage. Heal with bandages. Healers volition exist focused on the primary tank, then anybody else must exist prepared to take care of themselves.
Burn down Resistance gear is important for the MT and OT, but is subject to word for anybody else. It increases survivability, only people should pay attention not to gimp themselves besides much.
Most boss mods provide a large, loud alarm earlier Onyxia performs a Deep Breath attack. They also warn when she enters Phases Two and Three as well as providing general raid usefulness.They are generally recommended for use, as well as usually required by guilds.
The KLH Threat Meter mod provides a fairly accurate estimate of monster threat, although nothing beats being enlightened of how much threat you are putting upwardly. If everyone uses information technology, it tin assist avert loss of aggro past the principal tank.
Loot
Onyxia will drop two Tier two headpieces, one ![]() [Onyxia Hibernate Backpack] , the
[Onyxia Hibernate Backpack] , the ![]() [Head of Onyxia] (Alliance / Horde), two other items from her loot table, and a number of rare and uncommon world drop items. A skinner with 315 skill can also peel Onyxia to obtain 2 to four
[Head of Onyxia] (Alliance / Horde), two other items from her loot table, and a number of rare and uncommon world drop items. A skinner with 315 skill can also peel Onyxia to obtain 2 to four ![]() [Scale of Onyxia] . After Patch iii.ii.2, these items tin can now exist obtained from Nefarian in Blackwing Lair
[Scale of Onyxia] . After Patch iii.ii.2, these items tin can now exist obtained from Nefarian in Blackwing Lair
| | [Bloodfang Hood] | | [Dragonstalker's Helm] | |
| | [Halo of Transcendence] | | [Helmet of Ten Storms] | |
| | [Helm of Wrath] | | [Judgment Crown] | |
| | [Nemesis Skullcap] | | [Netherwind Crown] | |
| | [Stormrage Cover] |
| | [Ancient Cornerstone Grimoire] | | [Deathbringer] | |
| | [Eskhandar's Collar] | | [Mature Black Dragon Sinew] | |
| | [Ring of Bounden] | | [Sapphiron Drape] | |
| | [Shard of the Scale] | | [Vis'kag the Bloodletter] |
| | [Dragonslayer's Signet] | | [Onyxia Tooth Pendant] | |
| | [Onyxia Blood Talisman] |
Quests
Killing Onyxia was part of several ballsy quest chains.
- The warrior and paladin epic quest for [Quel'Serrar] , which starts from [Nostro's Compendium of Dragon Slaying] , a rare drop from Dire Maul bosses.
- The hunter quest concatenation for [Rhok'delar, Longbow of the Aboriginal Keepers] and [Lok'delar, Stave of the Aboriginal Keepers] . This concatenation starts from the [Ancient Petrified Foliage] , establish in the Enshroud of the Firelord, which appears after the defeat of
 Majordomo Executus in Molten Core. Onyxia drops a [Mature Black Dragon Sinew] in almost one of every 4 kills, and information technology is required to complete the chain.
 - The quest chain to open the Gates of Ahn'Qiraj, which starts with
 [lx] What Tomorrow Brings from Baristolth of the Shifting Sands in Cenarion Concord. Onyxia drops
  [Draconic for Dummies] for this chain.
 -
 [60] Celebrating Good Times and
  [60] For All To See , which each award one of [Dragonslayer's Signet] , [Onyxia Tooth Pendant] , or [Onyxia Claret Talisman] . The quest chain starts from [Head of Onyxia] (Alliance) / [Head of Onyxia] (Horde) after you lot loot it from Onyxia'southward corpse.
Bugs
Bugged heal
Onyxia heals herself for 45% over 10 seconds. This is extremely rare, simply just happens during Phase Three. It appears to happen just in very long fights. Even in long fights, though, it does not normally happen.
The healing is due to a bug, instead of a normal ability. It is not the normal "evade" healing, as Onyxia never evades and tin can be attacked ordinarily while she heals. It has been reported that she heals when she targets characters on the walls of the cave, just the heal has also been reported when there were no characters on the walls. In that location may be multiple triggers for this bug.
In a response to a GM ticket posted on the United states Staghelm Realm on October 8, 2006, a GM said that after viewing a fight in which Onyxia bug healed, the heal may have been caused by Onyxia existence unable to target players who were on the wall causing her to bug out. The GM as well stated that this issues is non being considered for correction at this time.
Onyxia's Caput Mounted in Stormwind
Melee in phase two
It seems that in phase 2, Onyxia will now sit downwardly and melee set on people. She tin can and then be tanked and melee damaged like if she wasn't flying. As of Patch 2.three, this issues seems to exist fixed now which means you can melee her fifty-fifty while in the air, but Onyxia will non sit down and melee attack anymore.
Wander off
Sometimes, Onyxia's aggro tabular array disappears and she starts wandering around the room, without attacking whatsoever raid member. This seems to happen in either Phase ane or iii.
In Wrath of the Lich King
- "She has lurked in her lair and washed boxing with the many brave adventurers who travelled to that familiar location over the years. At present, in accolade of the World of Warcraft five-yr ceremony, the dreaded brood mother Onyxia is being revamped to make a render to the forefront of Azeroth, as part of our large plans for the upcoming 3.2.2 content patch. This permanent update to Onyxia will catechumen the dungeon into 10- and 25-histrion modes. We will be adding new items to Onyxia's loot table that have the same model as some of the classic loot from this dungeon, similar Tier 2 helms, with stats updated to friction match the current level of content. There will be a special new item too: a normal drake-sized 310% speed flying mount modeled afterwards Onyxia herself called an Onyxia Broodling. We will besides exist updating the encounter mechanics to be more fitting for modern raiding, but we can guarantee players will get to experience the frightening horror of deep breaths once once again."[1]
Patch changes
See also
- Onyxia's Lair set up from the TCG
References
- ^ The Brood Female parent Returns | 2009-08-12 by
 Zarhym | Original link
External links
- Wowhead
- WoWDB
![]() WarcraftMovies Onyxia existence attempted by 1 player! Notwithstanding one of the Warders intervenes unintentionally and wipes him at 60%.
WarcraftMovies Onyxia existence attempted by 1 player! Notwithstanding one of the Warders intervenes unintentionally and wipes him at 60%.
![]() YouTube Level lxxx protection paladin successfully soloing Onyxia
YouTube Level lxxx protection paladin successfully soloing Onyxia
![]() YouTube Level lxxx warlock successfully soloing Onyxia
YouTube Level lxxx warlock successfully soloing Onyxia
![]() The Onyxia Bible Diagrams of which areas to run to when she deep breaths, depending on her position.
The Onyxia Bible Diagrams of which areas to run to when she deep breaths, depending on her position.
| | |
|---|---|
| |
|
| |
|
| |
|
| |
|
| |
|
| |
|
| |
|
| |
|
| |
|
| Bosses in grey were redesigned in a later expansion or removed from the game. | |
Source: https://wowpedia.fandom.com/wiki/Onyxia_(Classic)
0 Response to "Classic Wow - Never Lose Threat on Onyxia Ever Again"
Postar um comentário